- Published on
From Tracing to Patching using Frida
- Authors

- Name
- Ajin Deepak
Recently, while I was doing some tracing with frida at work. Around the same time my friend also convinced me to play Mini Militia again. This game was super popular when I was in school. Back then, the online experience was a mess because everyone was using mods, which pretty much ruined it. Eventually, the company shut down that version and rolled out a newer version with some tokens and subscriptions, which was BS. Nobody was happy with that version, and it was received very poorly. Later, they released the classic version. The developers said they had worked a lot to fix these hacks. So I thought, let's try some tracing with Frida and see if I can get something out.
Just to be clear, though: I'm not promoting modding or anything that could ruin the game again, and it's important to remember that it's illegal.
Requirements
To do this, you need to have Frida installed, and the device should be rooted. If you're new to Frida, familiarize yourself with it and then come back. You can follow my repo for this.
https://github.com/DERE-ad2001/Frida-Labs
Tracing using frida
Frida Trace is a powerful tool that lets you trace applications and monitor their function calls in real-time. Basically, it can help you trace the function calls made by the application.
https://frida.re/docs/frida-trace/
Tracing can save you a lot of time while doing reverse engineering. We will see how this works. For this purpose, I'm gonna use the Mini Militia APK. You can download it from the Play Store, pull it from your device, or download it from third-party websites.
https://play.google.com/store/apps/details?id=com.appsomniacs.mmc&hl=en_IN
So basically what we gonna do is some low effort modding lol.
Getting unlimited bullets
First we will try to get unlimited bullets in the game. Let's start by decompiling the apk into jadx.
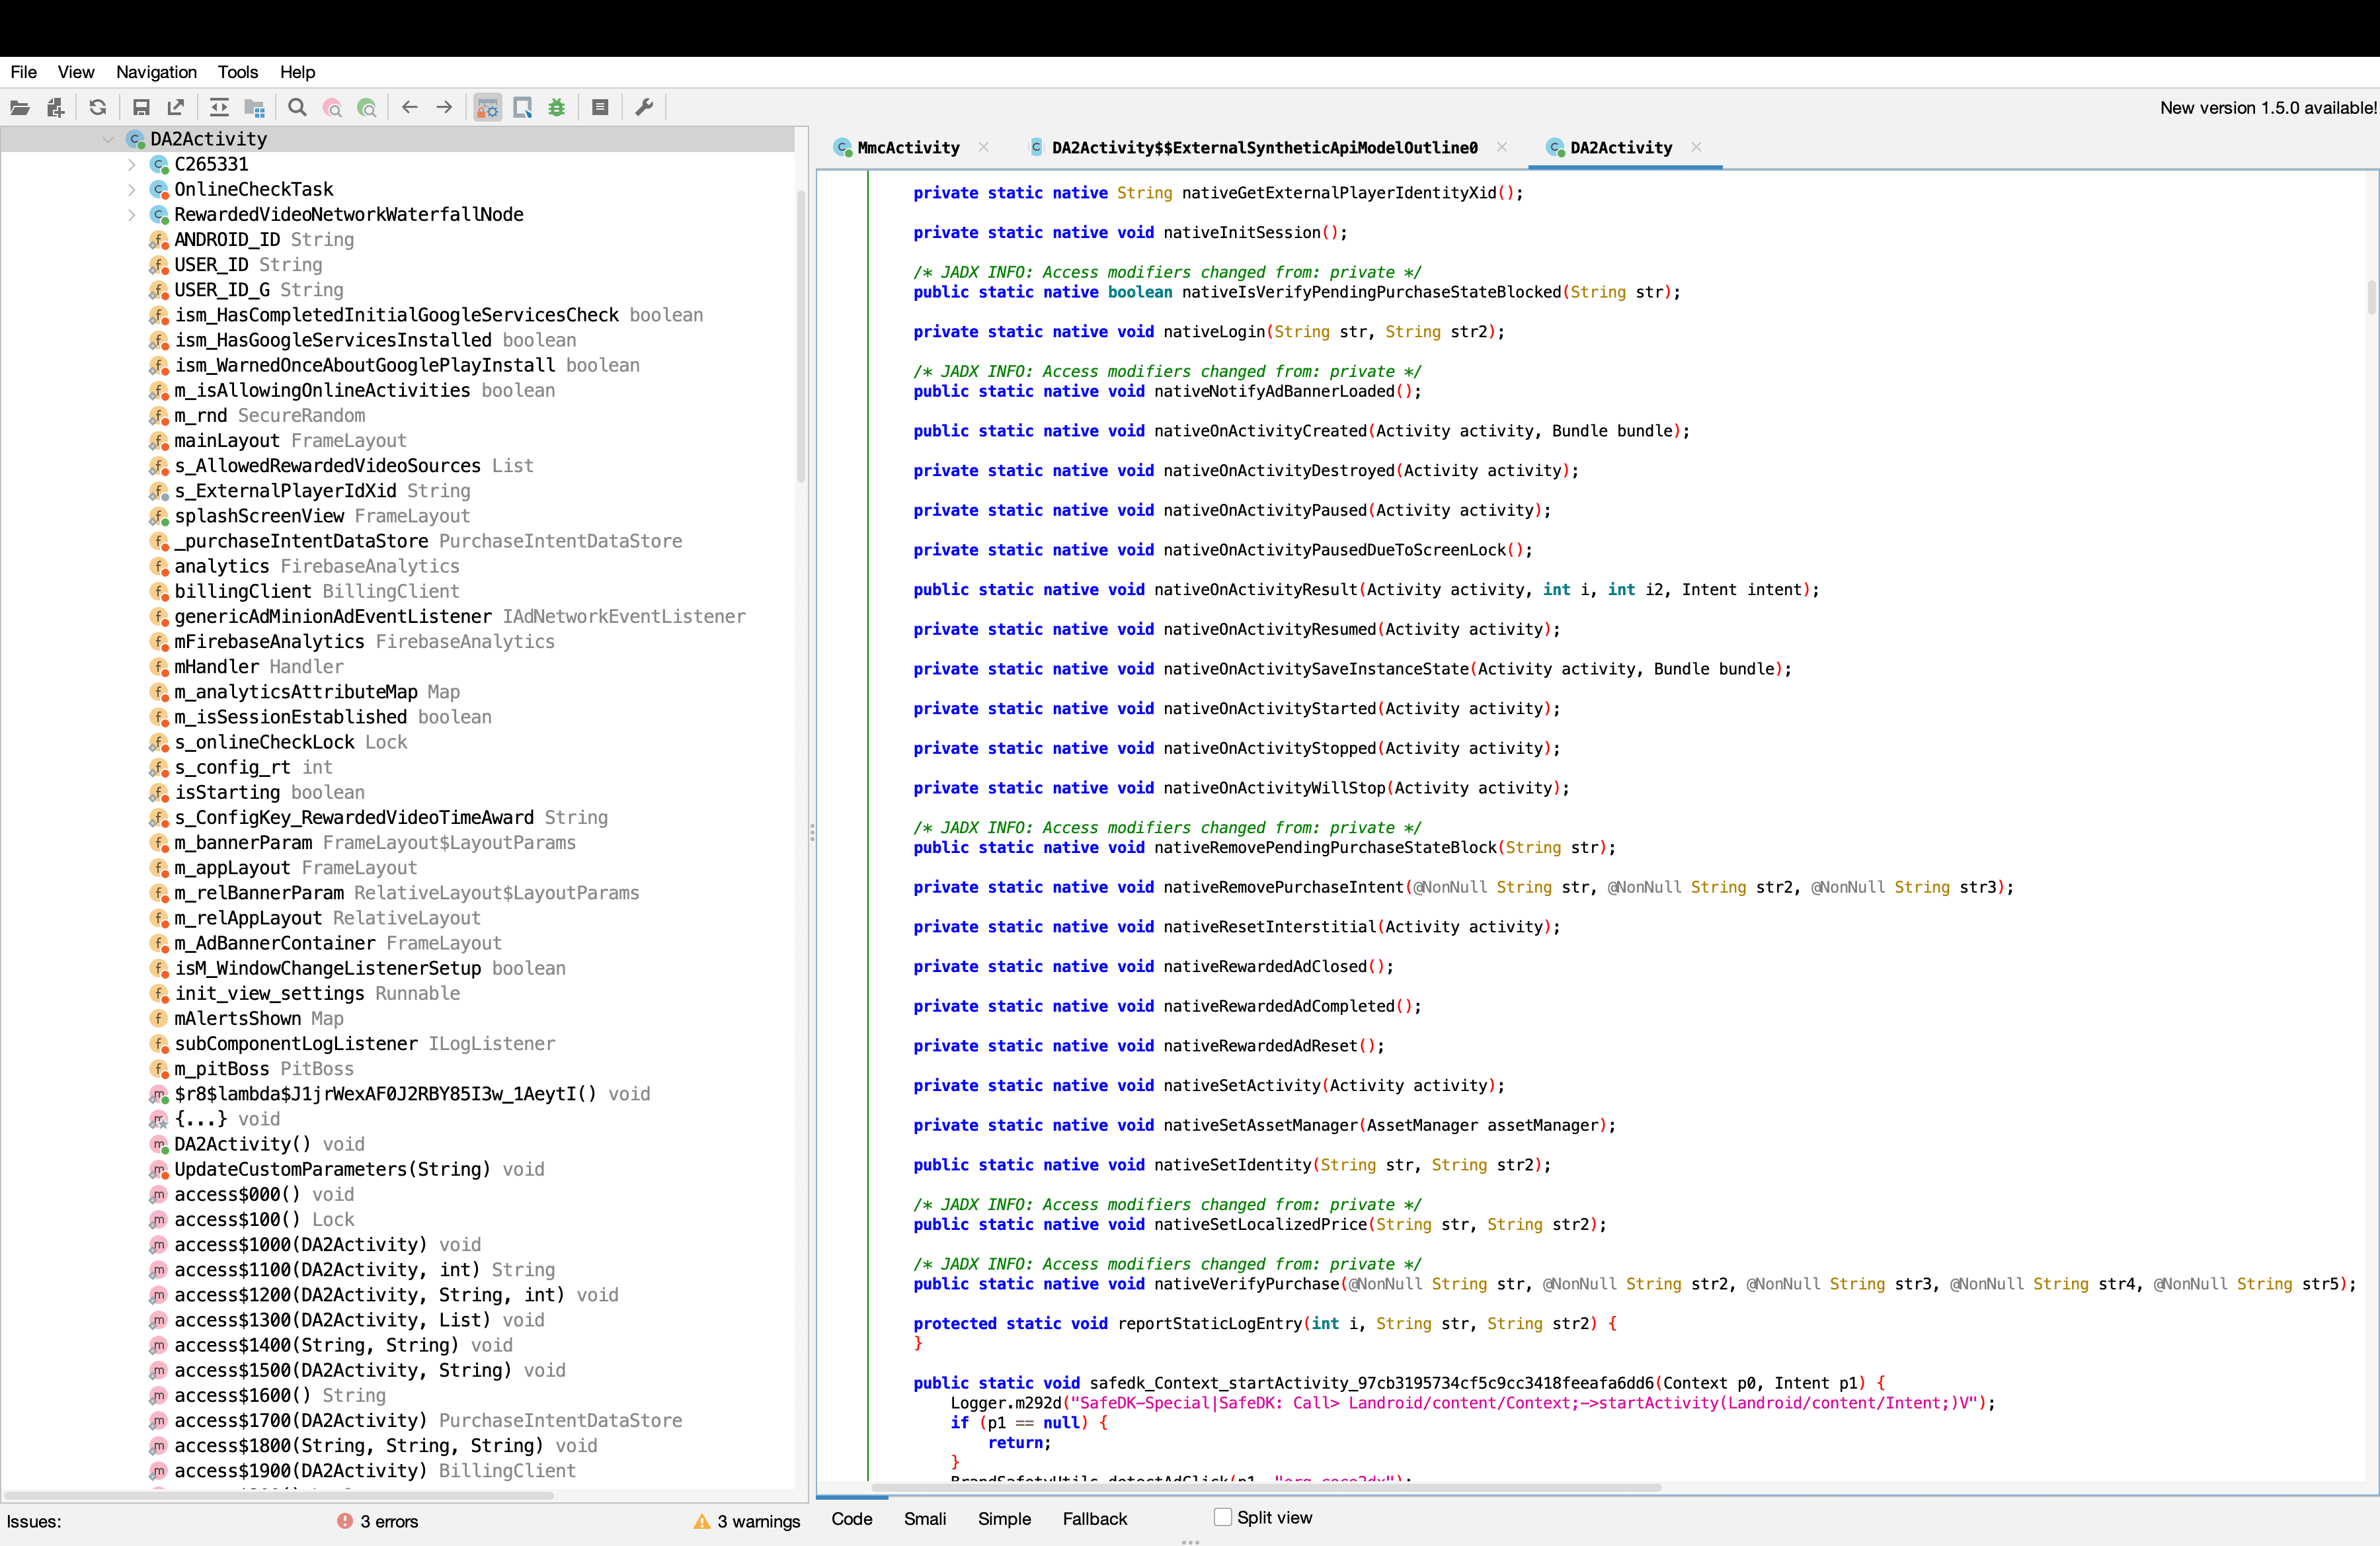
If look at DA2Activity there are a lot of native calls. If you scroll below you can see its using loadLibrary to load a library.

In the case of games, most of them use native libraries. We can discuss about this topic sometime later.
Let's take a look at the library.
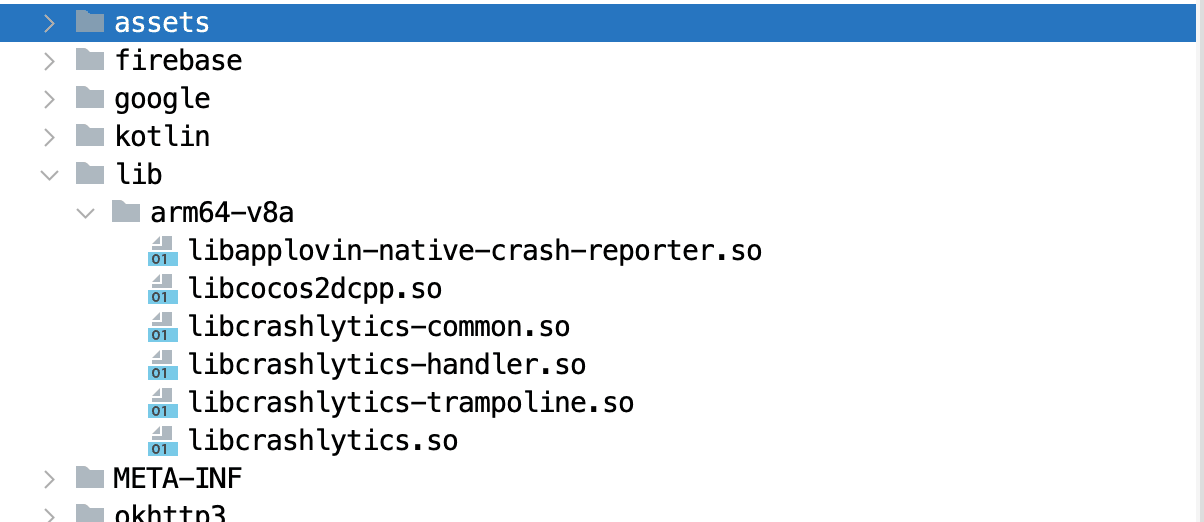
You can use Apktool or simply extract the APK by changing the extension to .zip to access the library. Next, let's load this library into Ghidra or another disassembler. I'm going to use Ghidra because it's open source, and I can't afford IDA Pro, lol. It will take some time to disassemble coz it's a large library so be patient.
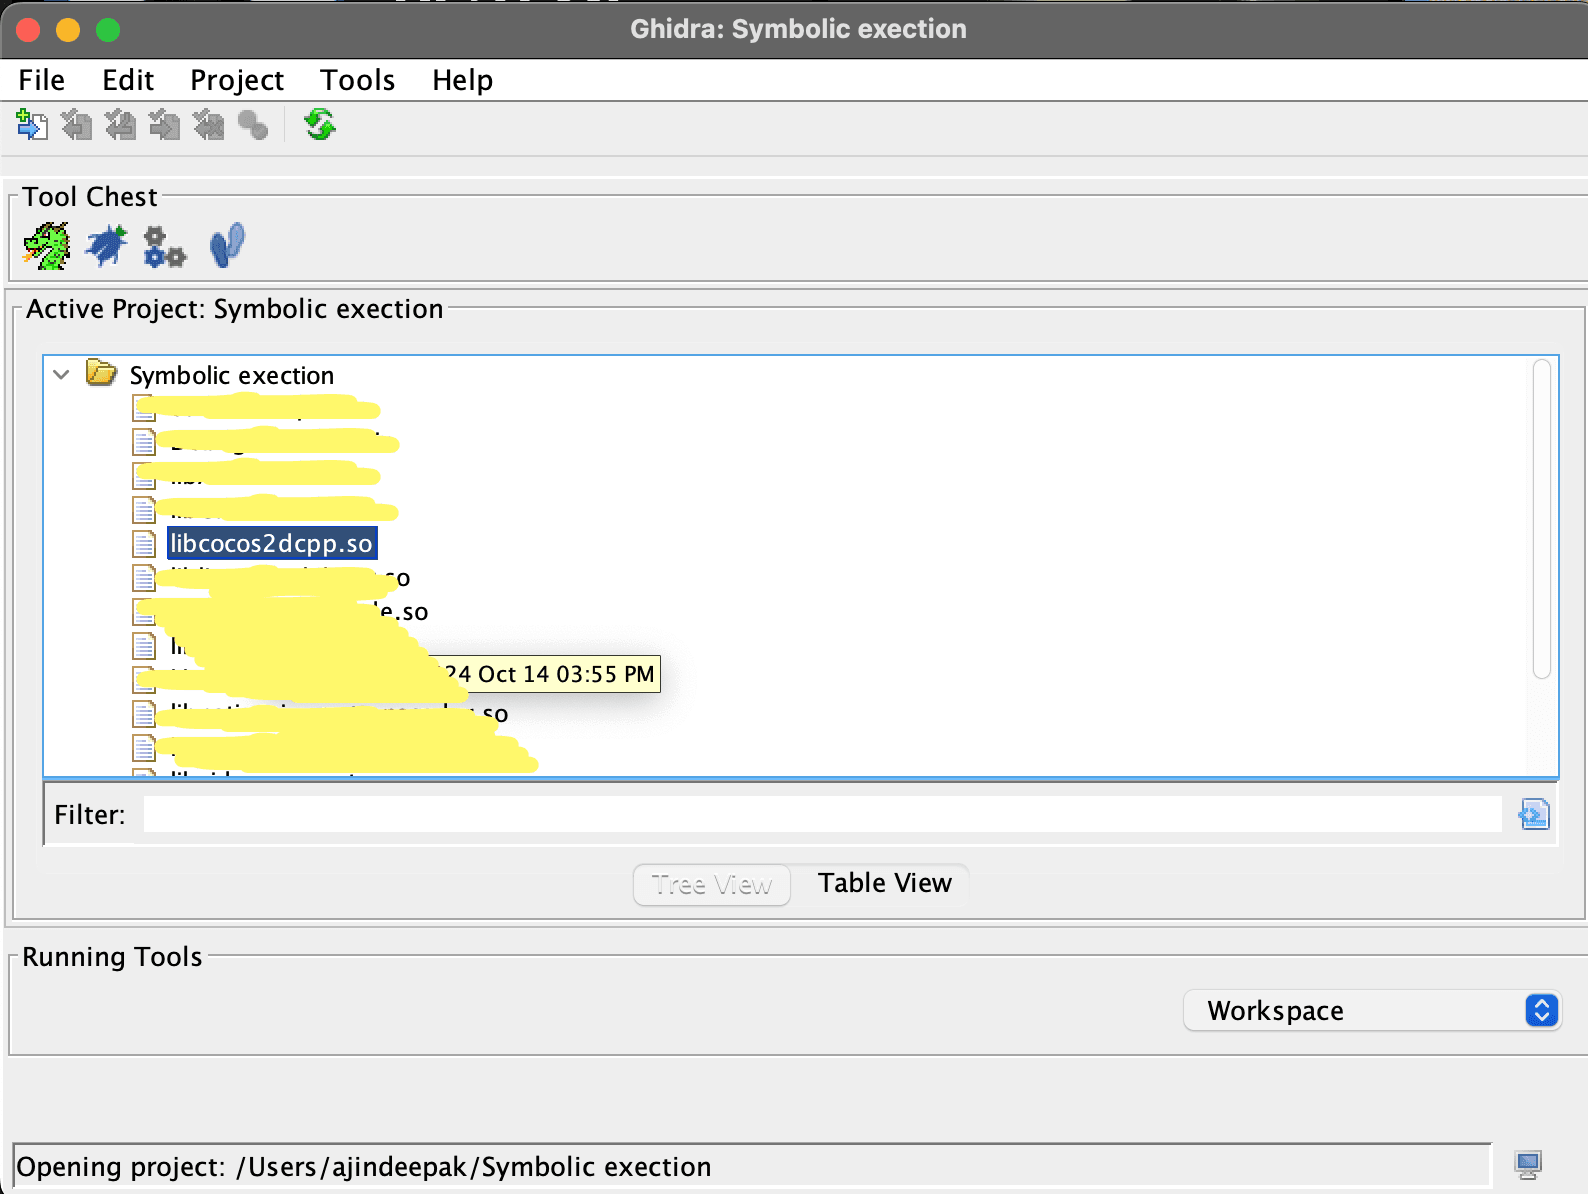
So here's where tracing becomes useful. If we want to reverse engineer and patch the application to get unlimited bullets, it will take a lot of time to find the function responsible for handling the bullets. You could try a brute-force approach using keywords like "bullets," "trigger," "ammo," "fire," etc., but there will be many functions, and you might get lost in a rabbit hole. However, using tracing can make this much easier. We can use frida-trace to trace these methods containing these keywords, and it will instrument them all. If a function is hit when we fire a bullet, it will be displayed, allowing us to confirm that those functions are responsible for that action. This will make the reverse engineering process easier.
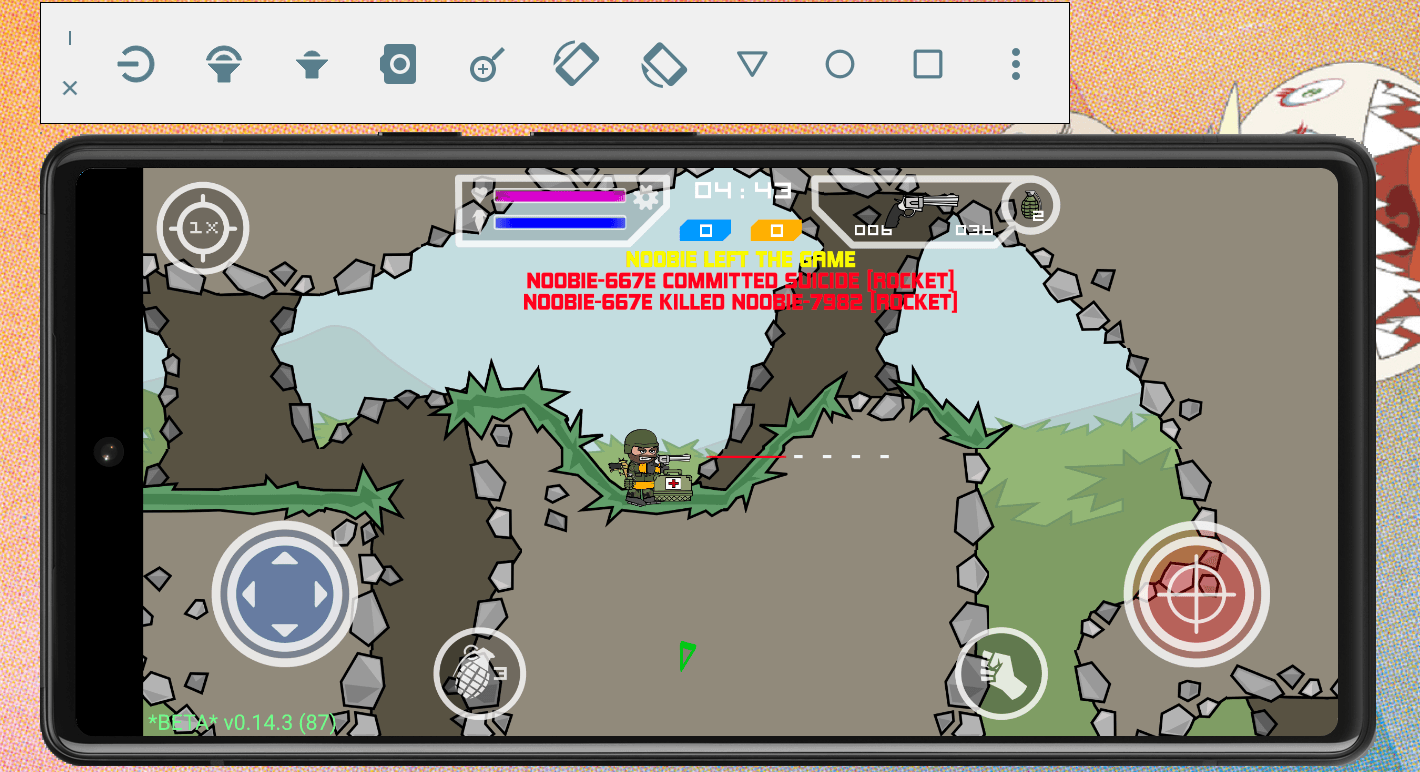
Let's start using frida trace. First let's start the game. I'm using my AVD emulator in my mac.
Let's start using frida-trace. I will give you a skeleton. But you should check out the documentation.
$ frida-trace -U -p <process_id> -i "<module_name/library>!*<function_pattern>*"
Explanation
frida-trace: This is the command used to start Frida's tracing functionality. It allows you to monitor function calls in real-time.-U: Connect to a USB device.-p <process_id>:-p: This flag specifies that you want to trace a specific process by its process ID (PID).<process_id>: Replace this with the actual PID of the target process you want to trace.
-i "<module_name>!*<function_pattern>*":-i: This flag indicates that you want to include only specific functions that match the given pattern.<module_name>: The name of the module or the library you are targeting.*<function_pattern>*: The pattern used to match function names. The asterisks (*) act as wildcards, meaning any function that contains "mem" in its name will be traced.
Take a look at the below example from the documentation.
$ frida-trace -p 1372 -i "msvcrt.dll!*mem*"
-p 1372:-p: This flag specifies that you want to trace a particular process by its Process ID (PID). Here the process ID is 1372.
-i "msvcrt.dll!*mem*":-i: This flag indicates that you want to include specific functions for tracing based on a pattern."msvcrt.dll!*mem*":msvcrt.dll: This is the name of the module (DLL) that contains the functions you want to trace. In this case, it's the Microsoft C Runtime Library.!*mem: This indicates that you are looking for functions within msvcrt.dll that match the pattern*mem. This includes functions likememcpy,memset, and others.
Enough explanation let's start tracing.
First let's find the process id of our app.
emu64a:/ # ps -A | grep -i "mmc"
u0_a197    7900  296 32614008 145348 do_epoll_wait   0 S com.appsomniacs.mmc
emu64a:/ #
So the process id is 7900. We already know the library name , its "libcocos2dcpp.so". Now what function will we try to trace. We can try to trace all the functions like this.
$ frida-trace -U -p 7900 -i "libcocos2dcpp.so"
But the problem is that this will generate a lot of noise and take a significant amount of time to instrument all of these methods. So, we will try a brute-force approach here. I traced some keywords, and after a few attempts, I got some hits with the word "trigger." Let me show you that. Make sure your frida server is up and running.
$ frida-trace -U -p 7900 -i "libcocos2dcpp.so!*trigger*"
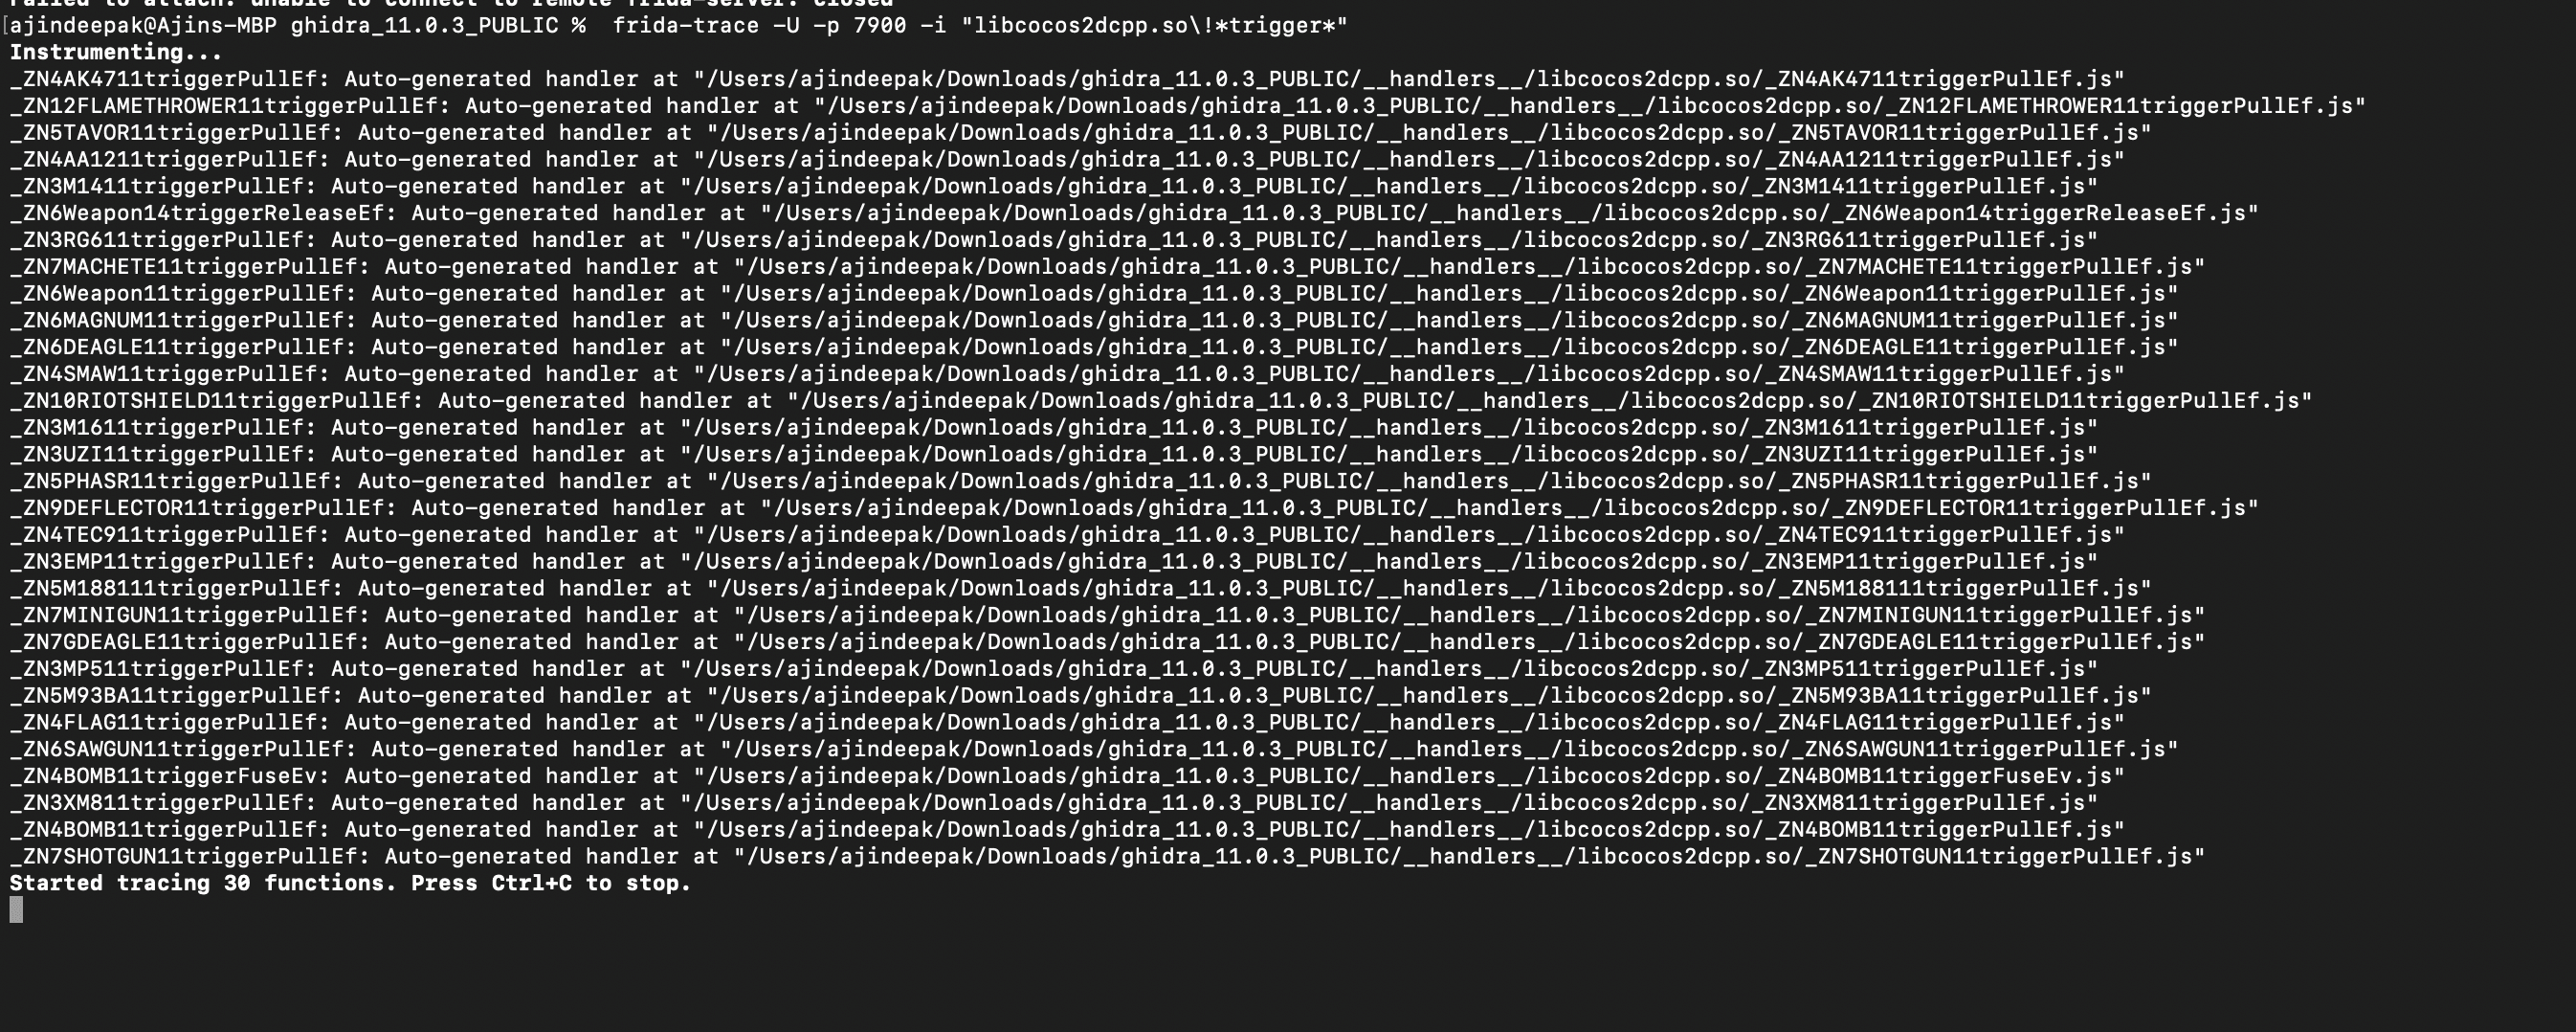
We can see that Frida Trace has auto-generated scripts for instrumenting the functions that have "trigger" in their names. It found around 30 functions.
Let's try firing a bullet.
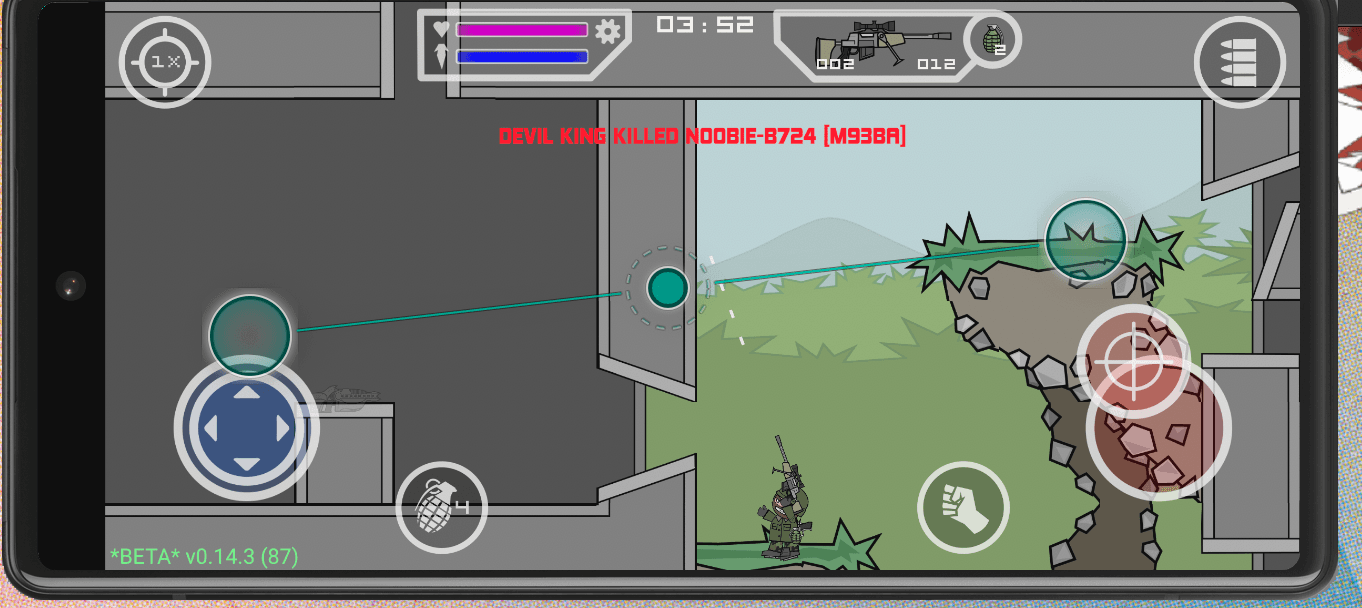
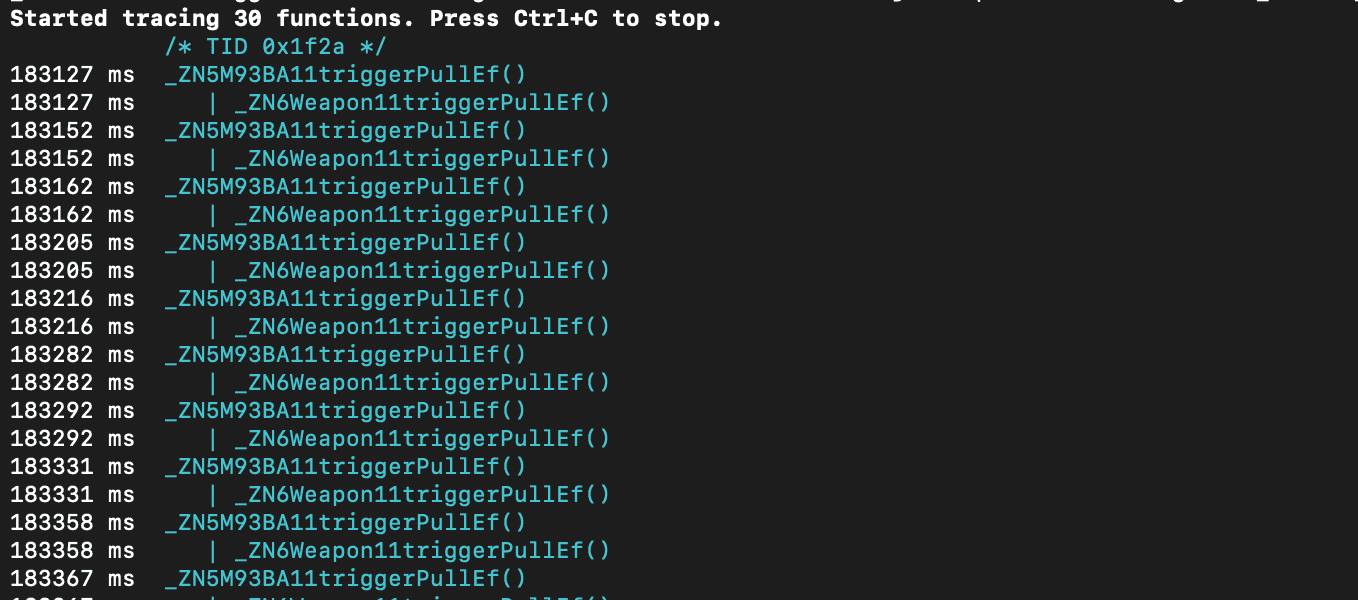
We can see that when I pull the trigger, these two functions are executed. The | separates the child function, _ZN6Weapon11triggerPullEf, which is called by the parent function, _ZN5M93BA11triggerPullEf. Now let's use ghidra and see what is happening.
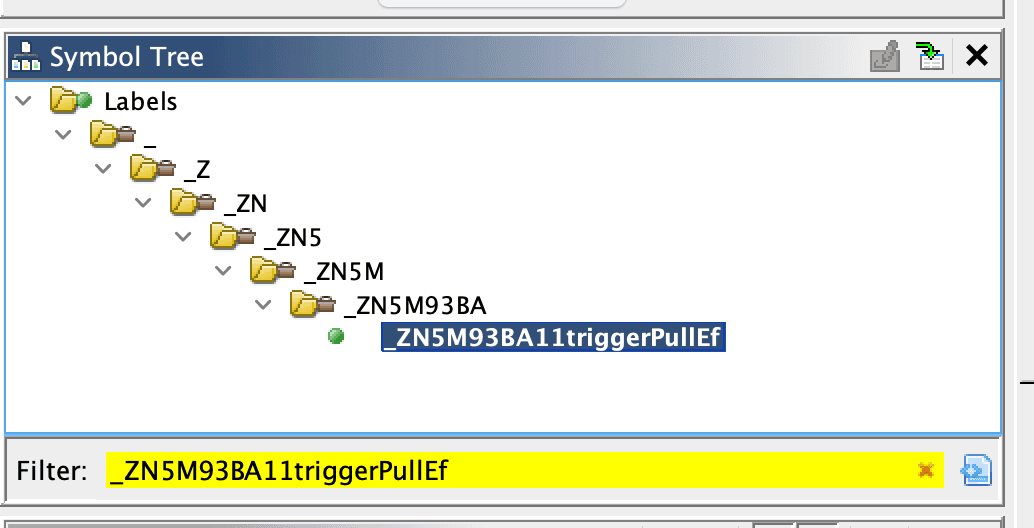
We can see the decompilation by double clicking.
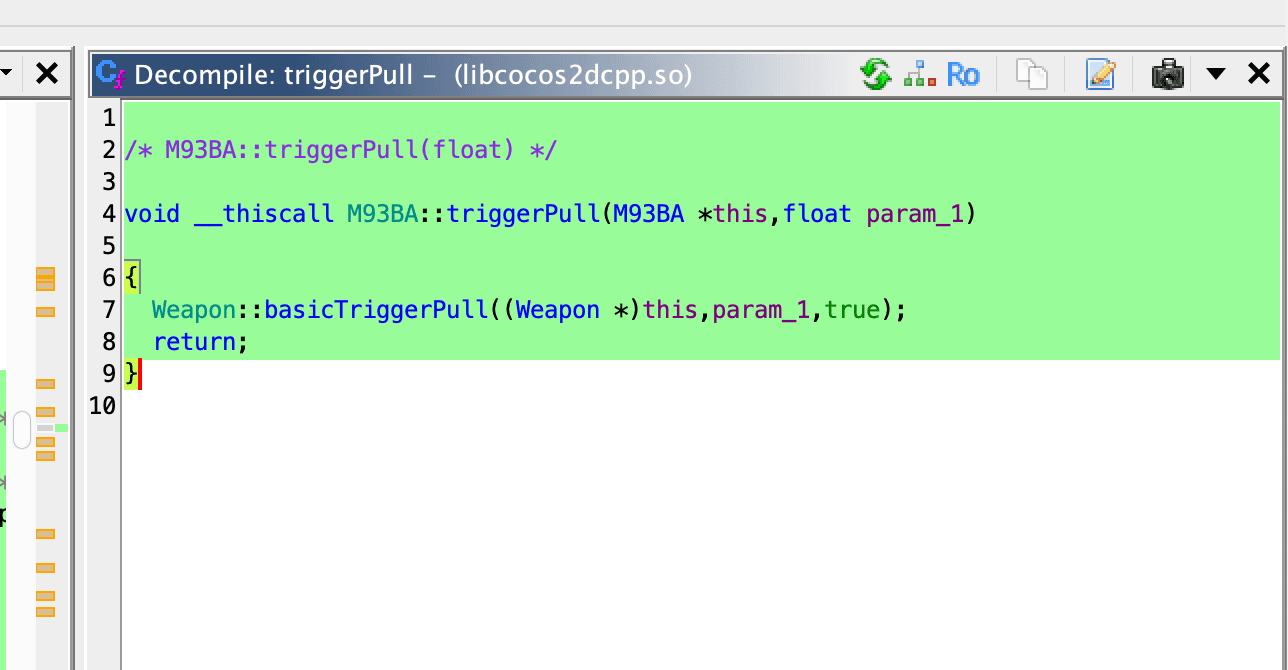
Let's take a look at the parent function _ZN5M93BA11triggerPullEf. It calls the method basicTriggerPull. If you search for other functions containing 'triggerPull,' you'll find many of them. Don’t get confused by the name, it's the same function. The name _ZN5M93BA11triggerPullEf is a mangled name, which is a way for C++ compilers to encode function names with information about namespaces, classes, and parameter types.
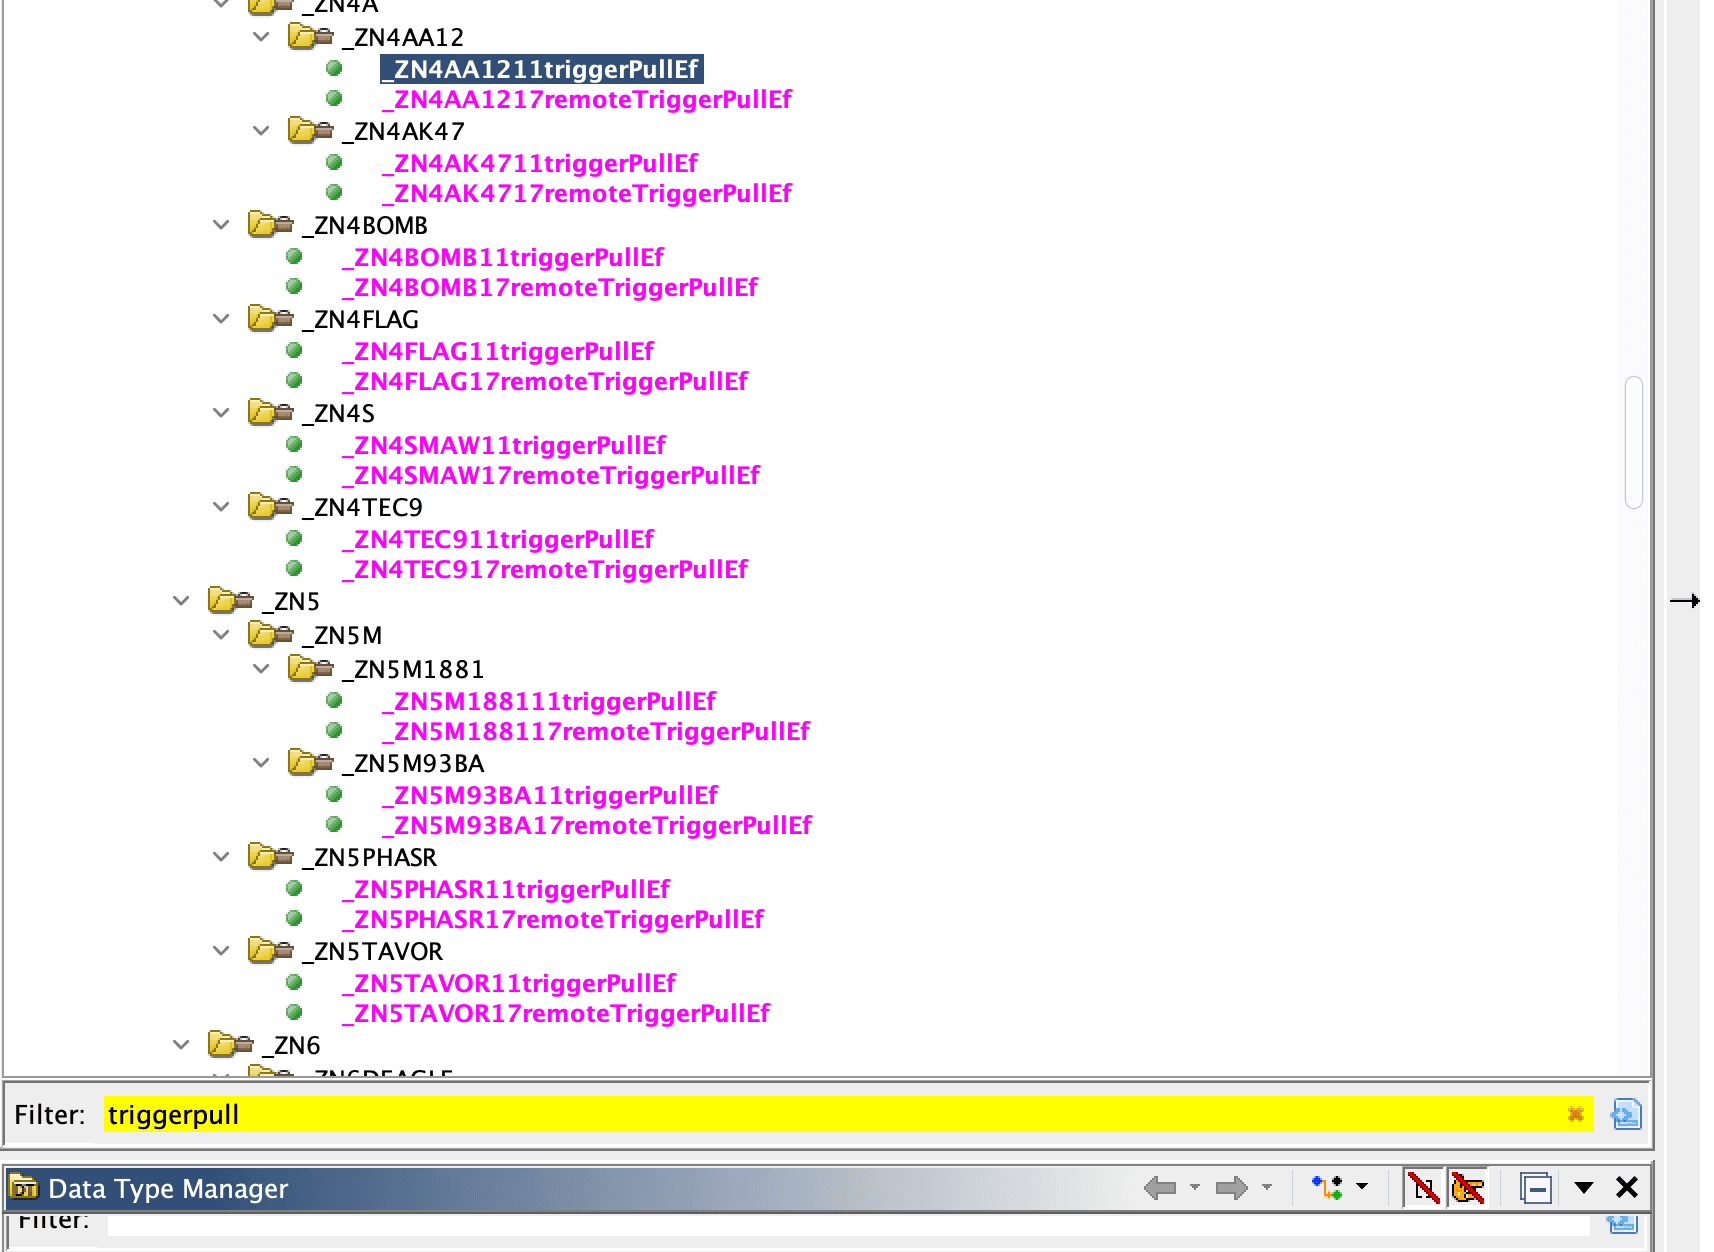
If you look careful these functions are prefixed with the name of the gun name. You can confirm this by tracing again. Try using a different gun then trigger the gun.
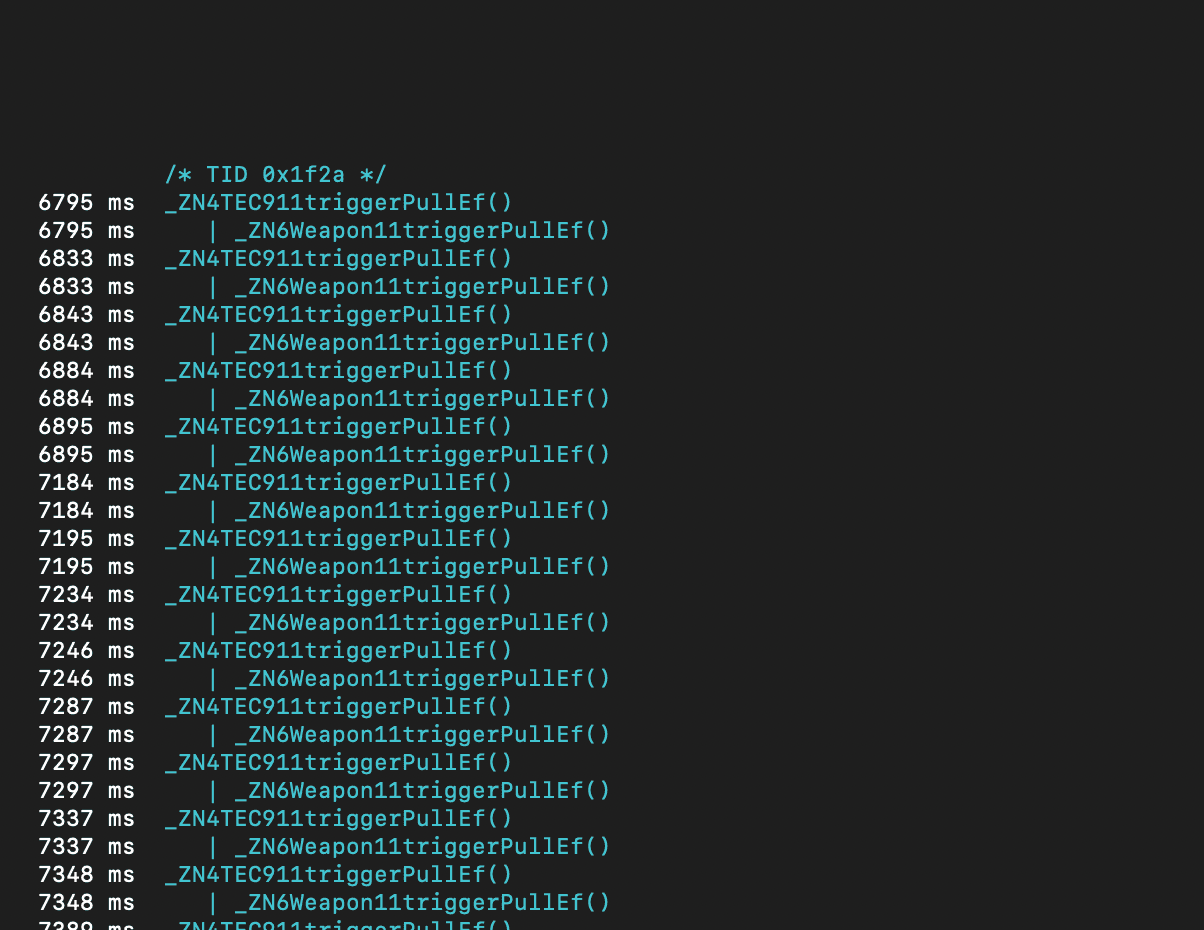
You can see that when I used the TEC-9 gun, the above function gets triggered.

Same for magnum.
But in all these cases, we can see that the _ZN6Weapon11triggerPullEf function was triggered. So let's open that function ghidra.
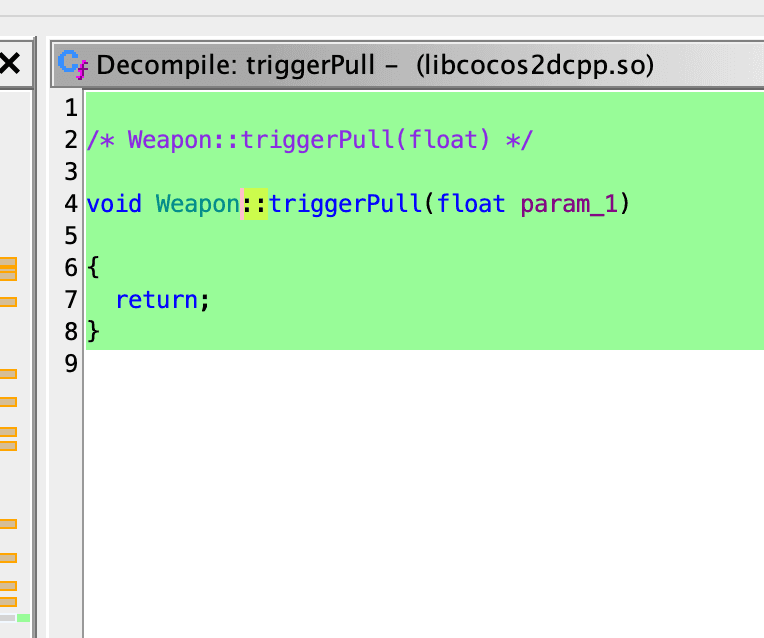
Breh... I really thought I was onto something. But anyway, if we look at the functions above in the trace, all of them call the basicTriggerPull function.
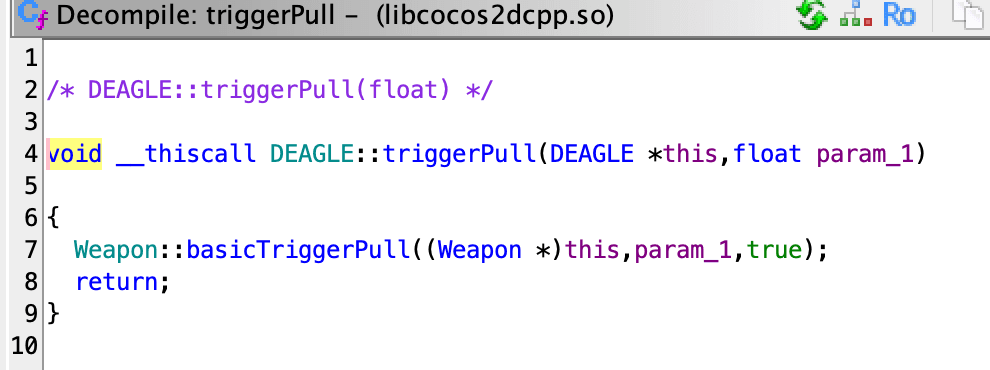
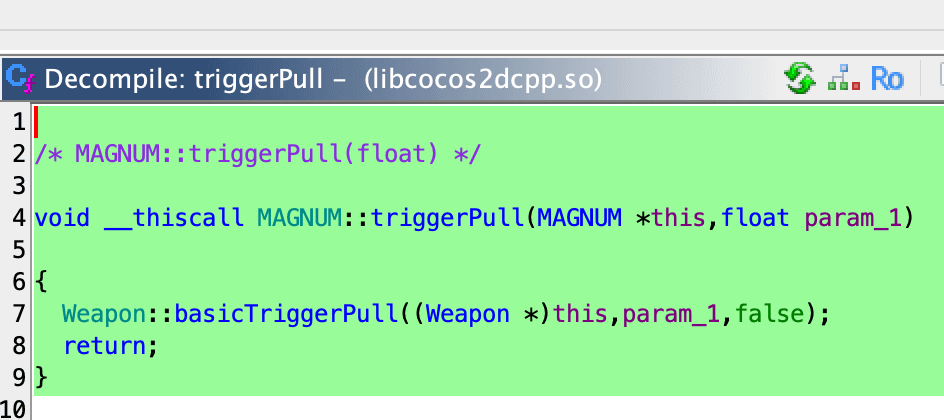
Let's take a look at the basicTriggerPull.
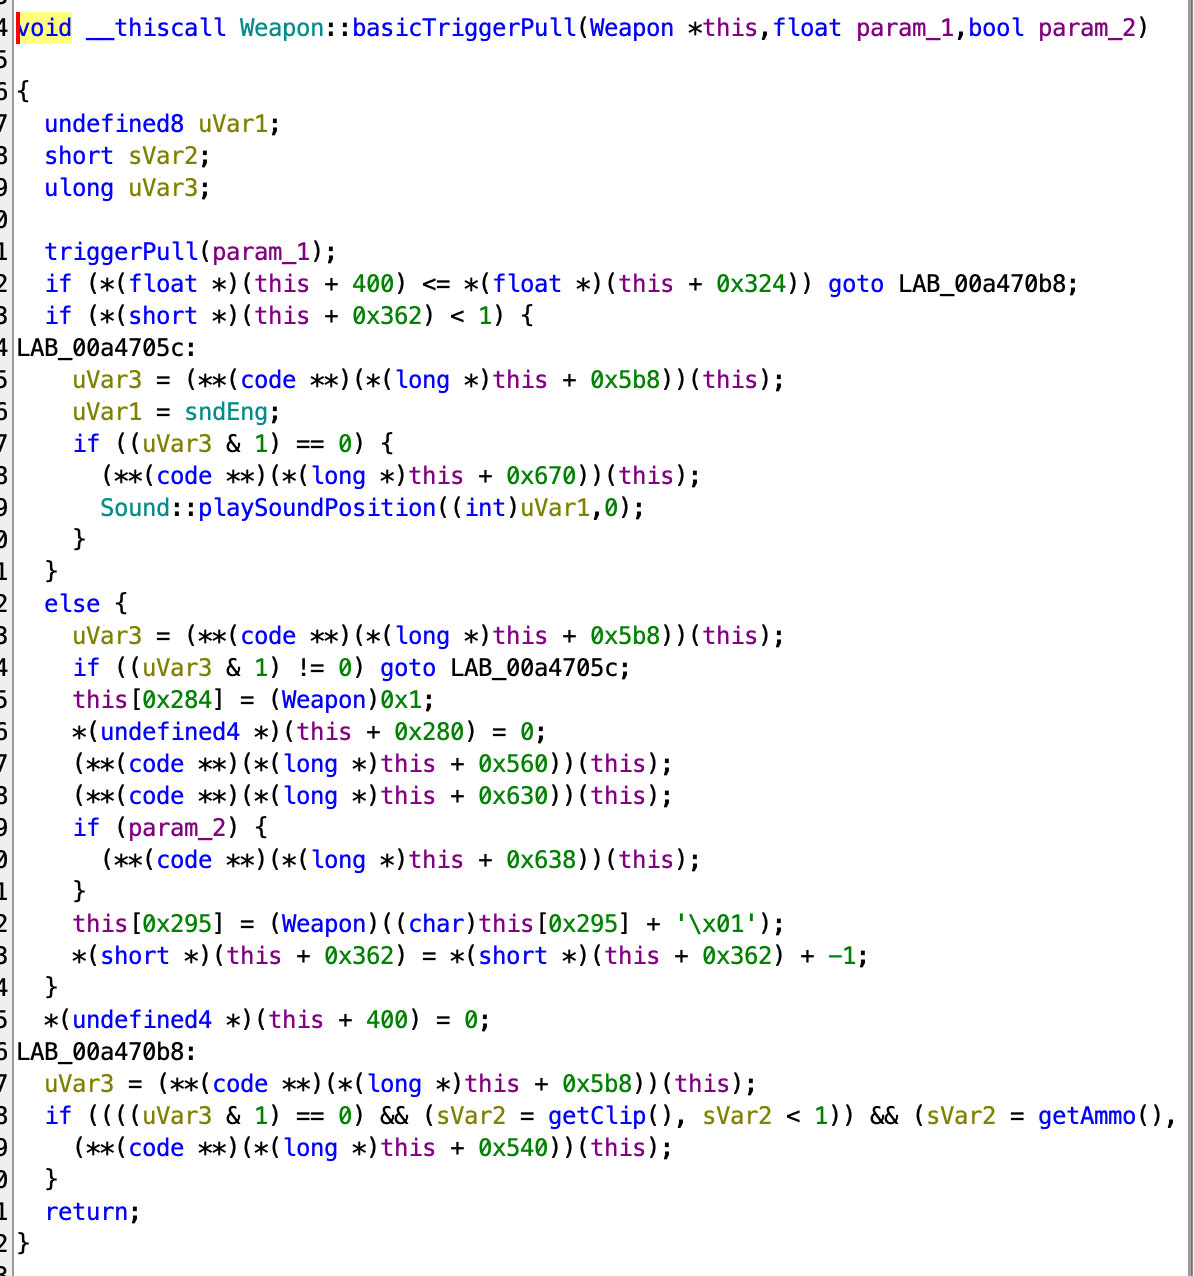
It handles the logic when we fire the bullet. If you look at the line:
*(short *)(this + 0x362) = *(short *)(this + 0x362) + -1;
It subtracts a bullet which is exactly what happens when a bullet is fired. If look at the disassembly it uses a sub instruction.
00a47050 29 05 00 51 sub w9,w9,#0x1
In order to get unlimited bullets, we can patch this instruction. We can either change the #0x1 to zero or change the sub instruction to an add instruction. I will do the first one here. For this we can use frida. We can also try to patch this but here i will be using frida.
Let's write the script.
// Find the base address of the library
var baseAddress = Module.findBaseAddress('libcocos2dcpp.so')

// Offset of the instruction to patch
var instructionOffset = 0x947050 //offset of the sub instruction
var adr = baseAddress.add(instructionOffset) // Address of the instruction

// Protect the memory region to allow writing
Memory.protect(adr, 0x1000, 'rwx') // Adjust protection size as necessary

// Define the new instruction bytes
var newInstruction = [0x29, 0x01, 0x00, 0x51] // Corresponding bytes for sub w9, w9, 0

try {
  // Write the new instruction bytes to the address
  Memory.writeByteArray(adr, newInstruction)

  console.log(`Instruction patched at ${adr}`)
} catch (error) {
  console.error('Error patching instruction:', error)
}
var baseAddress = Module.findBaseAddress("libcocos2dcpp.so");
This line retrieves the base address of the libcocos2dcpp.so library in memory.
var instructionOffset = 0x947050 // offset of the sub instruction
var adr = baseAddress.add(instructionOffset) // Address of the instruction
Here, an offset is defined (e.g., 0x947050), and the address of the specific instruction to patch is calculated by adding this offset to the base address. You can get the offset from ghidra. This is explained in my frida-labs repo.
Memory.protect(adr, 0x1000, 'rwx') // Adjust protection size as necessary
This line modifies the memory protection settings for the specified address, allowing it to be read, written, and executed (rwx). The protection size can be adjusted as needed.
var newInstruction = [0x29, 0x01, 0x00, 0x51] // Corresponding bytes for `sub w9, w9, 0`
This array contains the byte representation of the new instruction that will replace the existing one. The byte for the original sub w9, w9,#0x1 instruction was 0x29,0x05,0x00,0x51.

You get these codes from here:

try {
  Memory.writeByteArray(adr, newInstruction)
  console.log(`Instruction patched at ${adr}`)
} catch (error) {
  console.error('Error patching instruction:', error)
}
In this block, the code attempts to write the new instruction bytes to the specified address using the writeByteArray.
Let's start frida and inject our script.
ajindeepak@Ajins-MBP ghidra_11.0.3_PUBLIC % frida -U -p 7900
     ____
    / _  |   Frida 16.2.1 - A world-class dynamic instrumentation toolkit
   | (_| |
    > _  |   Commands:
   /_/ |_|       help      -> Displays the help system
   . . . .       object?   -> Display information about 'object'
   . . . .       exit/quit -> Exit
   . . . .
   . . . .   More info at https://frida.re/docs/home/
   . . . .
   . . . .   Connected to Android Emulator 5554 (id=emulator-5554)

[Android Emulator 5554::PID::7900 ]->
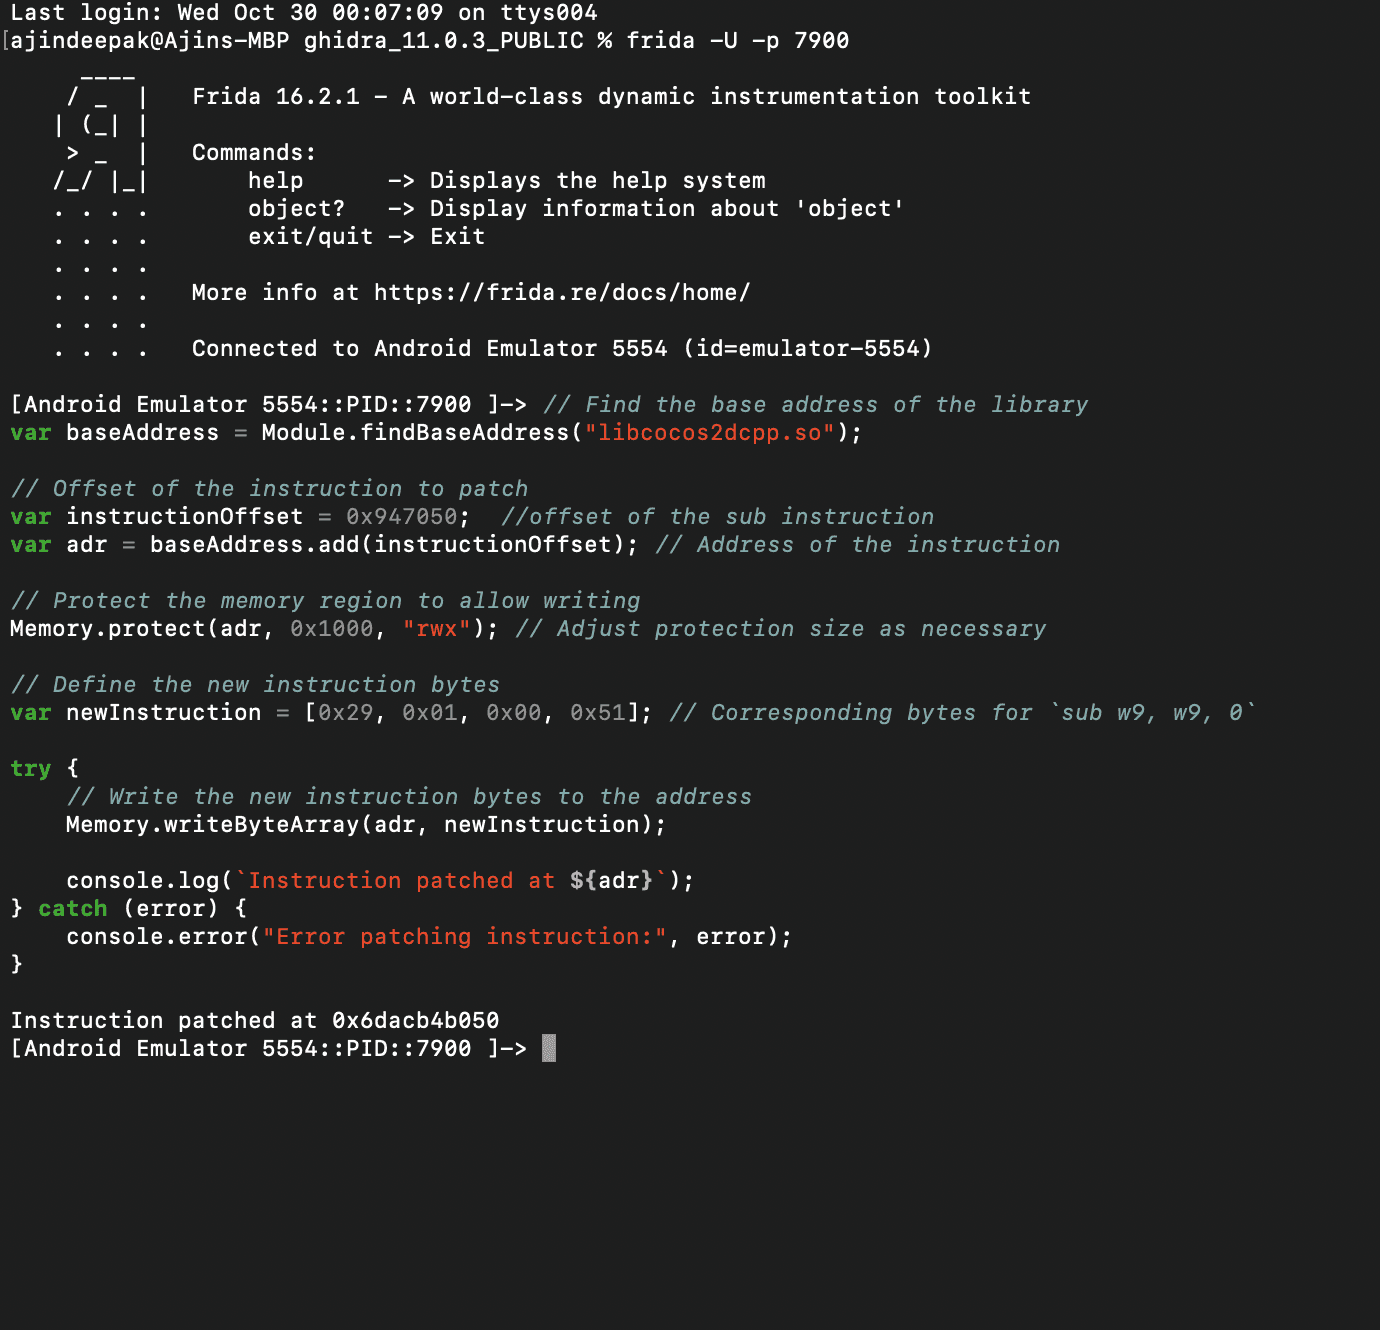
Yes our script is injected successfully. Let's try firing some bullets.
Woah!! We have unlimited bullets and also there's no reload. Very coooooool.
Unlimited JetPack
Now let's do the similar approach for achieving unlimited jetpack. Let's trace it I tried several words like fly, jetpack, etc. Didn't find anything. Then i tried power and got some hits.
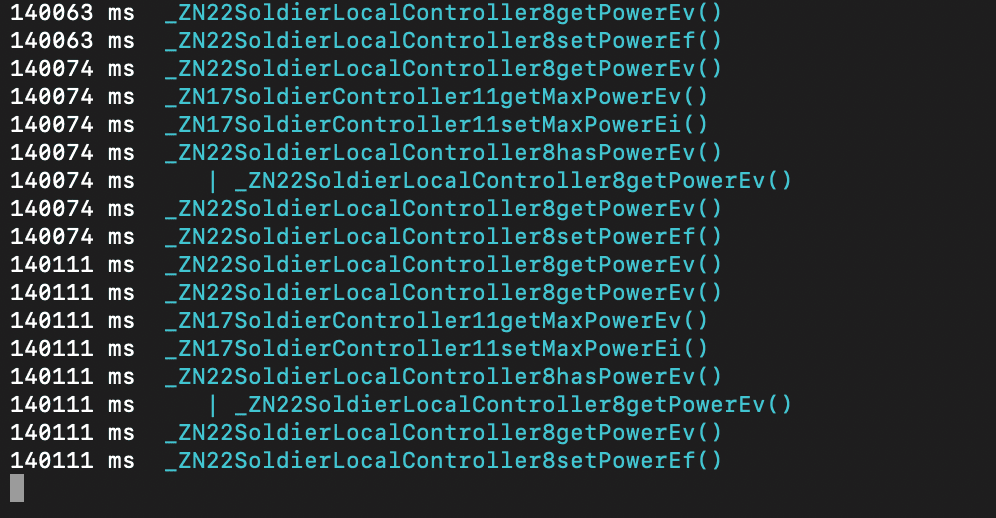
Let's go one by one. We will start with _ZN22SoldierLocalController8getPowerEv. Let's analyze this function in ghidra.
/* WARNING: Unknown calling convention -- yet parameter storage is locked */
/* SoldierLocalController::getPower() */

undefined4 SoldierLocalController::getPower(void)
{
  long in_x0;

  return *(undefined4 *)(in_x0 + 0x278);
}
Nothing much. Let's try _ZN22SoldierLocalController8hasPowerEv, as the name is sus. It seems likely that it's checking for some kind of power or ability.
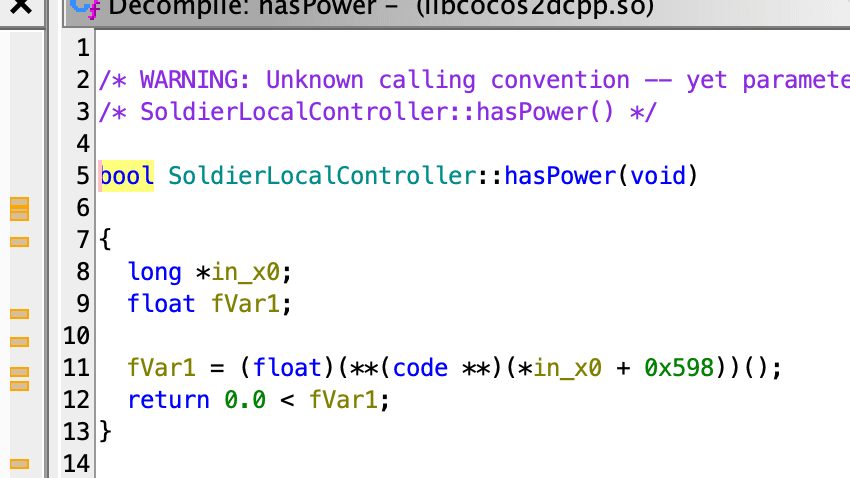
I think we hit the jackpot. It's a boolean method and it seems like it checks if the jetpack is empty or not. If it's 0 then it will return false else it will return true indicating that the jetpack is still available. You check the disassembly for clarity.
Let's quickly write a frida script. You can just use ChatGPT for this, but sometimes it may require some tweaking to work. Let's hook this method and return true always.
const targetFunction = "_ZN22SoldierLocalController8hasPowerEv";

const baseAddress = Module.findBaseAddress("libcocos2dcpp.so");
const functionAddress = Module.findExportByName("libcocos2dcpp.so", targetFunction);

if (functionAddress) {
    console.log(`Hooking hasPower at address: ${functionAddress}`);

    Interceptor.attach(functionAddress, {
        onEnter: function(args) {
            // Log entry if needed
            console.log("Entering hasPower");
        },
        onLeave: function(retval) {
            // Modify the return value to true (1)
            retval.replace(1);
            console.log("Returning true from hasPower");
        }
    });
} else {
    console.log("hasPower function not found");
}
Let's inject this script in frida and see if it works.
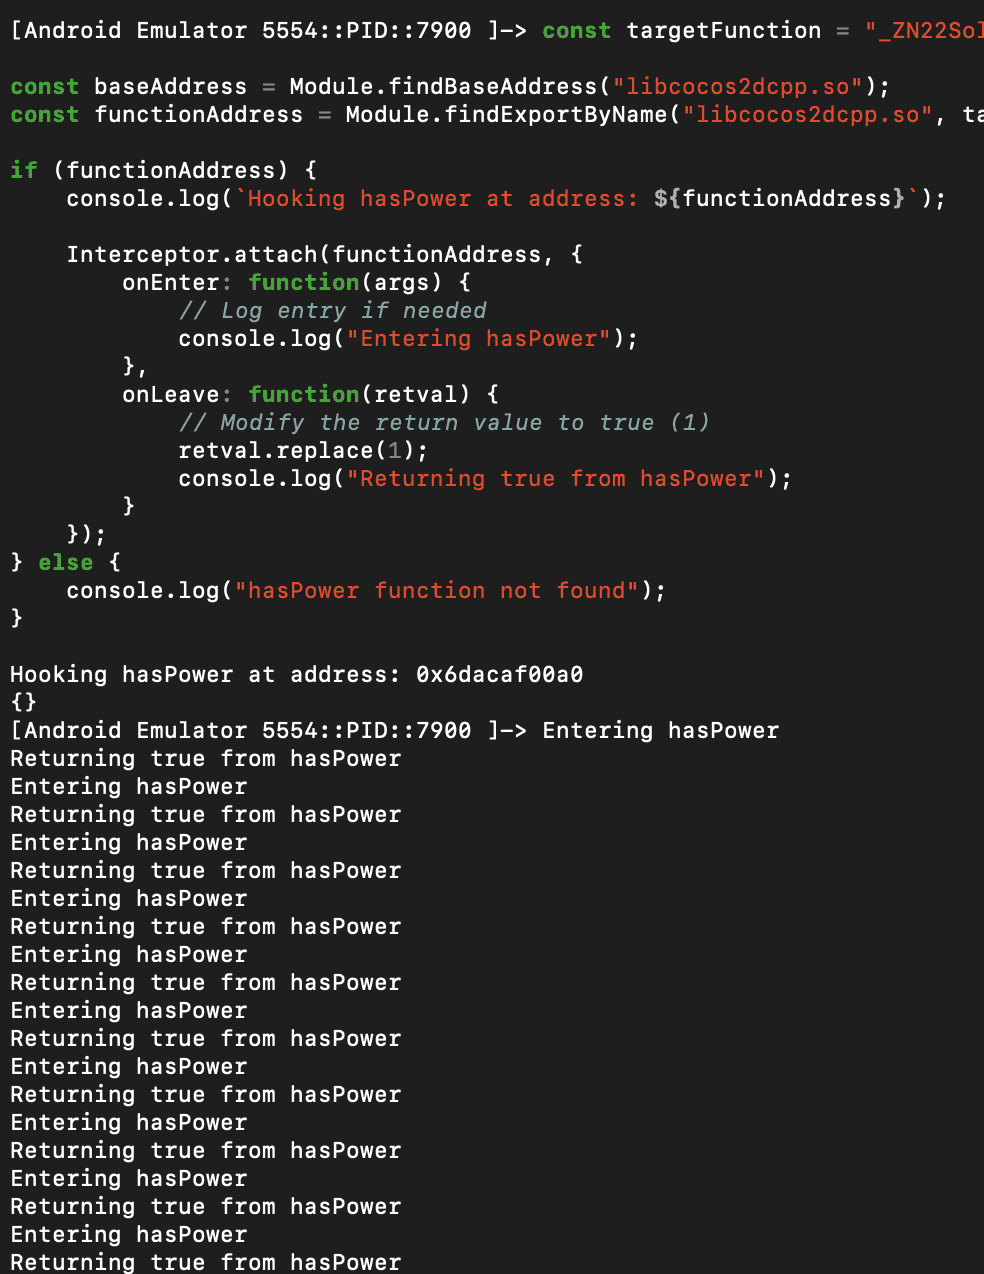
Perfect let's try flying.
Unlimited jetpackkkkkkkkkkk !!!!!!
Conclusion
We can see how powerful is frida-trace if it's used properly. It can make reverse engineering process very fast. This is just an example to show you that. And please don't make mods and publish them. Hope you had a good read :)